Guitar Project by Rob Hawkins
Woodwork
For this I'm going to have the help of my dad who has all the tools i need to do the things I want to do like sanding, varnishing and the shaping of the head.
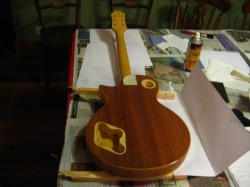
To place the neck in the guitar i had, as the neck was to big, scrape down the neck (using a wood scraper) to size so it would fit into the slot, I then bolted it into place as tight as i could get it, also just because I'm sad I lined up all the heads on the screws. The body of the guitar did not need sanding down as it was already smooth enough.
Now, I have shaped the head to do this i marked out the shape i wanted with a pencil and then cut around it and sanded and filled it down to be nice and smooth, bolted the neck into the body of the guitar and have applied the varnish to the back of the guitar, and have un-successfully, started spraying the front of the guitar, but that should soon be finished.
To place the neck in the guitar i had, as the neck was to big, scrape down the neck (using a wood scraper) to size so it would fit into the slot, I then bolted it into place as tight as i could get it, also just because I'm sad I lined up all the heads on the screws. The body of the guitar did not need sanding down as it was already smooth enough.
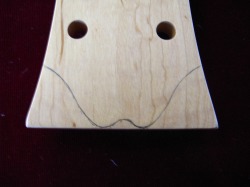
Now, I have shaped the head to do this i marked out the shape i wanted with a pencil and then cut around it and sanded and filled it down to be nice and smooth, bolted the neck into the body of the guitar and have applied the varnish to the back of the guitar, and have un-successfully, started spraying the front of the guitar, but that should soon be finished.
Varnishing
To varnish the guitar I brushed the whole body and neck down with a brush to get all the dust off of the body so it wouldn't show up in the varnish. Then I sprayed the back of the guitar and the back of the neck and let them dry and then again after that, and it was perfect, Then I started spraying the front but I over sprayed it and caused it to run. For it to dry your suppose to leave it in a dust free room at room temperature but I didn't have the "dust free" room.
As a little finishing tough I am going to put a layer of bee's wax over the body of the guitar, witch would make it smoother and just a better finish.
As a little finishing tough I am going to put a layer of bee's wax over the body of the guitar, witch would make it smoother and just a better finish.
The Woods.
Believe it or not the wood that the guitar is made of does make a rather big difference, harder woods like the one on this guitar make a more rocky sound, whereas softer woods like maple make a more brighter sound, and then there are semi-acoustic guitar which are a bit of both and are generally louder and make a nicer sound than none semi-acoustic guitars when plugged into an amp.
